I enjoy photographing my yarn as well as my finished knits and other craft projects, but my lighting is always bad. I forget to take them when the light is best or just snap the photo to get it over with and always feel like I could have done better.
In an attempt to improve my skills and give myself the tools to learn more about indoor photography, I decided to build myself a mini studio/light box. It is definitely not for portraiture, but smaller objects like skeins of yarn. It still needs some work, but for about $10 worth of materials it is a good start. I built a 2 x 2 x 2 cube with 20 feet of 1/2" PVC, 4 3-way joints, and 4 90-degree elbows.

I opted not to have a complete cube, with pipe on all four sides of the bottom, so I could use poster board or similar materials for the bottom if I wished without the cardboard bowing and with less pipe to worry about being exposed.
For today's purposes, I used a king-sized white bed sheet that I already had, and draped it over the cube, tucking it around the pipe as best I could.
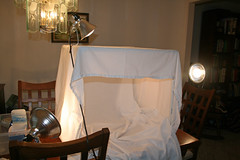
Eventually, I plan to buy heavier cotton fabric and make custom panels that attach with velcro around the pipe. This would help with the problem of the wrinkles you can see all over my sheet and allow me to use different colors if I want.
I borrowed some lighting from my parents, but they are basically just simple shop lights you can buy at Home Depot or Lowe's with daylight spectrum bulbs. The ones I used were 65 watts each, but I'll probably go up to 100 watts when I replace them. The hardest part of this whole process was finding something to attach the lights to that was close enough and stable enough, which is why I want brighter bulbs.
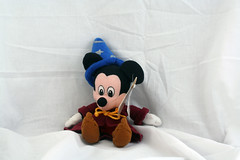
Here are some examples of my first attempts at studio lighting. I did have to adjust the tint on these, as I apparently had my white balance set wrong, but otherwise, they are unedited.
Mickey:
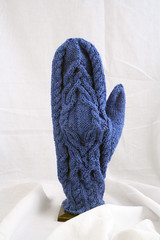
Hand-knit mitten:
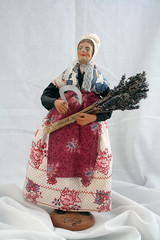
"Lavendar Gatherer" Santon from southern France: